

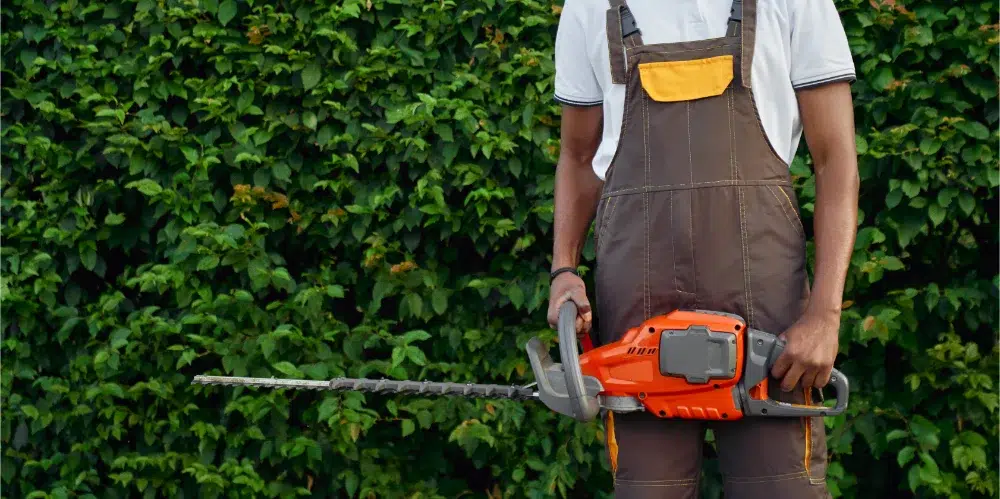
Hedge trimming might look simple, but it’s surprisingly easy to get wrong. From uneven cuts to mistimed trimming, small errors can lead to big problems: damaged plants, patchy growth, and costly fixes. In this article, we’re tackling the most frequent hedge trimming mistakes that homeowners make and how to avoid them. Whether you’re a first-timer or a seasoned DIYer, these tips will help you get cleaner results with less frustration.
The 9 Most Common Hedge Trimming Mistakes
Even confident DIYers can unknowingly make serious hedge trimming mistakes. While they might seem harmless at first, hedge trimming mistakes can lead to long-term issues like disease, stunted growth, and unsightly hedges. Below, we break down the most common missteps and how to correct (or avoid) them entirely.
1. Trimming at the Wrong Time
Timing matters more than most people realize when it comes to hedge health and appearance.
How It Happens
Many people start trimming as soon as they see new growth, not realizing that the plant is still vulnerable. Late-season trims can also expose fresh cuts to frost, which damages tissue and delays regrowth. Flowering hedges are especially sensitive and can lose their buds entirely if pruned too early.
How to Avoid It
Understand your hedge species and its growth cycle. In general, the best time to trim hedges is after the first flush of growth in late spring, or in early fall when the heat has passed but frost hasn’t set in. Avoid trimming during extreme weather or when plants are actively flowering unless it’s for corrective shaping.
2. Cutting Too Much at Once
Overzealous pruning is a common rookie mistake that can seriously backfire.
How It Happens
Trying to reshape an overgrown hedge in one go often leads to cutting far too deep into the foliage. This shocks the plant, weakens its structure, and may even expose woody stems that won’t regrow. It also increases the chance of uneven, awkward shapes that are hard to correct later. This is one of the most damaging hedge trimming mistakes, especially when dealing with slow-growing species.
How to Avoid It
Follow the “one-third rule”: never remove more than one-third of the plant at a time. If your hedge is wildly overgrown, space out your cuts over a couple of weeks. This approach allows the plant to recover and makes shaping easier and more forgiving.
3. Using Dull or Dirty Tools
Your tools play a big role in the health of your hedge, even more than you might expect.
How It Happens
Blunt blades don’t slice cleanly; they crush and tear the plant tissue, leaving jagged wounds that invite disease. Dirty blades, especially those used on multiple plants, can transfer bacteria, fungus, or pests from one hedge to another. This is one of the easiest hedge trimming mistakes to make, and to fix.
How to Avoid It
Sharpen your blades before every major trimming session and give them a quick clean with rubbing alcohol or diluted bleach. For larger hedges, pause midway to recheck sharpness. This small habit makes a massive difference in both the look and health of your plants.
4. Ignoring Hedge Shape Principles
A poor shape isn’t just a visual issue; it’s one of those subtle hedge trimming mistakes that leads to long-term thinning
How It Happens:
Many homeowners instinctively cut straight across the top and sides, trying to create a clean box shape. But when the top of the hedge is wider or the same width as the bottom, sunlight doesn’t reach the lower branches. Over time, the base thins out, and your hedge loses its density from the ground up.
How to Avoid It
Trim so that the base is slightly wider than the top. This hedge trimming technique creates a tapered or “A” shape that allows light to penetrate evenly across the plant. Use a guide string or angled poles if needed to maintain consistency across your entire hedge.
Get It Done Right the First Time
Tired of uneven cuts and expensive do-overs? Our Ottawa-based team offers expert hedge and tree trimming that gets it right, from the first cut to the final cleanup.
5. Skipping Safety Measures
Trimming hedges may not seem dangerous, but it often involves sharp tools and unstable footing.
How It Happens
In a rush to get the job done, people skip gloves, eye protection, or proper ladder placement. This leads to slips, cuts, and uneven trimming caused by poor visibility or awkward positioning. In some cases, you might not even notice the poor results until you’ve stepped back.
How to Avoid It
Wear sturdy gloves and safety glasses every time you trim. If you’re using a ladder, set it up on firm, level ground, and never overreach. Take your time to set up properly, it’s faster than fixing mistakes or recovering from an accident.
6. Trimming When Wet
Moisture changes everything when it comes to cutting precision.
How It Happens:
Trimming after rain or when the hedge is covered in morning dew makes the branches heavier and slipperier. Wet foliage resists clean cuts, making your work messier and your blades duller faster. It also increases the risk of spreading disease, since moisture helps pathogens thrive.
How to Avoid It
Wait until your hedge is fully dry before starting any trimming. If you’re in a rush, prioritize dry areas and come back for the rest later. Keeping tools dry and the hedge dry gives you better control and a cleaner finish.
7. Not Planning the Cut Path
One of the trickiest hedge trimming mistakes to correct is trimming without a plan. Winging it leads to crooked hedges and inconsistent results.
How It Happens
Without a plan, it’s easy to lose your line and overcorrect, especially on taller hedges or ones with curves. This results in uneven surfaces, bald patches, or one side being shorter than the other. Once it’s cut, there’s no undo button.
How to Avoid It
Use a taut string, chalk line, or even stakes and twine to mark the shape you’re going for. Step back frequently to check your progress. Treat hedge trimming like a sculpture, it’s about stepping back as much as cutting forward.
8. Treating All Hedges the Same Way
Every plant has its own personality, and trimming them all the same way is a fast track to trouble.
How It Happens
Homeowners often assume that if one trimming technique works on their cedar hedge, it should work on their boxwood or yew. But different species have different growth rates, recovery patterns, and seasonal needs. Treating them the same can result in poor shape, stunted growth, or even plant death.
How to Avoid It
Learn the specific requirements of each hedge type in your yard. Broadleaf evergreens, deciduous shrubs, and conifers all respond differently to cuts. When in doubt, research the species or ask a pro, it’s one of the simplest ways to avoid costly hedge trimming mistakes.
9. Forgetting Cleanup and Aftercare
You’re not done when the last branch falls; aftercare matters.
How It Happens
Leaving clippings behind smothers grass, attracts pests, and can even rot against the hedge base. Skipping post-trim inspection means you might miss open wounds or signs of stress that need attention before they become problems.
How to Avoid It
Clean up all debris immediately and dispose of it away from the hedge line. Water the base lightly if the day is dry, and do a quick inspection for damage, pests, or uneven spots you may have missed. A five-minute follow-up can prevent weeks of recovery issues.

Spot the Mistake
Knowing what to avoid is half the battle. Sometimes, the best way to understand hedge trimming mistakes is to see how they play out in real-world situations. Below are examples that highlight common missteps and what should have been done instead.
| Scenario | What Went Wrong | What Should’ve Happened |
|---|---|---|
| “I trimmed my cedar hedge in early April, and now the tips are all brown.” | Spring frost damaged the fresh cuts. | Trimmed later in spring when frost risk was gone. |
| “I cut my boxwood hedge almost in half to get it back in shape, but now it looks dead in the middle.” | Too much was removed at once. | Pruned gradually over the season using the one-third rule. |
| “I used my old hedge shears without sharpening them and noticed the cuts looked torn.” | Dull blades caused ragged, unhealthy cuts. | Sharpened blades before trimming for cleaner results. |
| “I shaped my hedge into a perfect rectangle but now the bottom is all bare.” | Poor light distribution from an inverted shape. | Trimmed the base slightly wider than the top for even light. |
| “I trimmed while it was still wet from morning rain, and now some branches have spots and mold.” | Wet conditions led to fungal issues. | Waited for a dry day to avoid spreading disease. |
Each of these examples represents a real, avoidable hedge trimming mistake that could be prevented with just a bit more planning or the right tools.
Bonus Tips for a Cleaner, Healthier Trim
Want that clean, crisp, pro-level look? Here are a few extra tips that will take your beginner hedge trimming to the next level and help you dodge future hedge trimming mistakes.
Use Guides or Templates
For curved or shaped hedges, cardboard templates or flexible guide wires can help you stay consistent. This is especially useful for topiary or ornamental designs.
Trim in Layers
Don’t try to take off too much at once. Make a rough pass first, then a second clean-up pass to shape it perfectly. This helps prevent overcutting and keeps things symmetrical.
Step Back Often
Every few minutes, stop and back up a few feet. What looks straight up close often isn’t. This one habit alone helps you catch small errors before they turn into big hedge trimming mistakes.
Consider Seasonal Maintenance
Pair trimming with other seasonal tasks like fertilizing, watering, and checking for pests. A well-rounded maintenance routine supports healthier regrowth after each trim.
If you’d rather not take any chances, we offer professional hedge trimming services in Ottawa that guarantee clean results, safe practices, and no mistakes. Learn more about our hedge trimming services.
The Cost of Mistakes (and the Value of Doing It Right)
Bad trims don’t just look rough, they can cost you. Correcting hedge trimming mistakes often isn’t a simple fix. Uneven cuts may require professional reshaping, pest control, or even full hedge replacement, all of which can drive up hedge trimming costs fast.
In worse cases, improper pruning leads to long-term plant stress, pest infestations, or dead zones that require replacement hedges altogether. The time, money, and effort to fix avoidable issues adds up quickly, especially if multiple hedges are involved.
Investing a bit more time upfront, or hiring professionals from the start, is often the cheaper and safer route in the long run.
FAQ: Avoiding Hedge Trimming Mistakes
Even with a good plan, it’s easy to second-guess yourself. Here are a few common questions people ask when trying to avoid hedge trimming mistakes.
In short,
Hedge trimming isn’t just about keeping things neat; it’s about keeping your plants healthy and your property looking sharp. The most common hedge trimming mistakes can cost you in time, money, and curb appeal if left unchecked. By learning what to avoid, how to trim correctly, and when to bring in the pros, you set your hedges up for long-term success.
When in doubt, don’t guess, get help. Our team is here to make sure your hedges are trimmed right the first time.
Get It Done Right the First Time
Tired of uneven cuts and expensive do-overs? Our Ottawa-based team offers expert hedge and tree trimming that gets it right, from the first cut to the final cleanup.