

You finally cut down that tree and now you’re left with the stubborn reminder: a solid, ugly stump that refuses to die. Maybe you’ve tried hacking at it with an axe, or maybe it’s just sitting there mocking you every time you mow the lawn. The good news? DIY stump removal doesn’t have to be impossible, or expensive. With a few tools, patience, and the right approach, you can reclaim your yard without calling in the pros.
What Is Stump Removal?
Simply put, stump removal is the process of eliminating the remaining tree base and roots from the ground after a tree has been cut down. The goal is to clear the space completely, preventing regrowth, pests, or tripping hazards while restoring your yard’s appearance.

Benefits of Stump Removal
Tree stumps might look harmless, but they cause more issues than most people expect. They can attract insects, grow fungi, or even sprout new shoots that make your garden look messy again. Below are a few key benefits of stump removal and why it’s worth doing sooner rather than later:
In short, getting rid of that stump is both a cosmetic and practical move. Now let’s dive into how to do it yourself, safely, efficiently, and without wrecking your back.
Is A Stubborn Stump Getting in the Way of Your Landscaping?
From site assessments to removal strategies, we’ll help you prepare your yard for your next project. Contact us today for quick and hazard-free stump removal.
DIY Stump Removal Guide
Removing a stump on your own can be done in several ways, depending on how deep the roots go, the size of the stump, and how much time or energy you want to spend. This section covers DIY stump removal techniques that work, the tools you’ll need, and a few that you might want to avoid.
Manual DIY Stump Removal
When you’d rather sweat than spend, this is your go-to. Manual methods rely on physical effort and basic tools, ideal for smaller or medium stumps with manageable root systems.
Best Used For
Tools You’ll Need
How to Do It
- Dig a trench about a foot wide around the stump using a shovel. Go deep enough to expose the main roots (typically 12–18 inches).
- Cut through roots as you uncover them. Use loppers or a hand saw for smaller ones, and an axe or reciprocating saw for thick ones.
- Loosen the stump by wedging a pry bar or the flat end of a mattock under one side. Rock it back and forth to break remaining roots.
- Work around the stump, repeating the process until it shifts freely.
- Pull or pry it out, then remove remaining root fragments before backfilling the hole with soil.
What to Watch Out For
Manual DIY stump removal takes active time and energy. Deep or widespread roots can double your effort. Also, avoid using your car or truck to pull the stump out, that’s how bumpers get sacrificed.

Chemical or Product-Based Stump Removal
If you’d rather let science do the heavy lifting, chemical or commercial stump removers speed up natural decay. It’s one of the most popular DIY stump removal routes for large, deep-rooted stumps when you’ve got patience but not much free time.
Best Used For
Tools You’ll Need
Recommended Products & What Works Best
Any product labeled “stump remover” with potassium nitrate listed first as the active ingredient will do the trick.
Avoid anything that promises “instant” results, that usually means a stronger oxidizer that risks damaging surrounding soil or roots from nearby plants.
How to Do It
- Drill several holes into the top of the stump, about 1 inch wide and 8–10 inches deep. Space them a few inches apart.
- Drill angled holes into the sides of major roots to help the chemical reach the entire root system.
- Pour stump remover (usually potassium nitrate) into each hole, following the label instructions.
- Add water to dissolve the granules and activate the process.
- Cover the stump with a tarp to trap moisture and keep out rainwater.
- Wait four to six weeks, checking occasionally. Once the wood softens, use an axe or shovel to break it apart and remove it completely.*
*Keep in mind that chemical removers work best on freshly cut stumps with some moisture; very dry or old stumps will absorb the chemicals more slowly, which can delay decomposition.
What to Watch Out For
Always check safety instructions, especially if kids or pets use the yard. Also, skip the old myth about pouring bleach or motor oil into the stump. Both are harmful to soil and groundwater and do absolutely nothing to accelerate decay.
Natural & Eco-Friendly Methods
Not into chemicals or heavy tools? You can go the slow, green route. These DIY stump removal techniques use ingredients you probably already have at home.
Best For
Tools You’ll Need
Common Ingredients for Natural Stump Removal
Epsom Salt (Magnesium Sulfate):
The most effective natural option. It dehydrates the wood and prevents regrowth by cutting off moisture to the roots. Works best when applied repeatedly over several weeks.
White Vinegar (5% Acidity):
Another safe method for smaller stumps. It slowly breaks down the stump’s cell structure. Stronger horticultural vinegar (20%) speeds things up but must be handled carefully to avoid harming nearby plants.
Rock Salt (Sodium Chloride):
Sometimes used as a substitute, but less effective and more likely to harm soil fertility if overused. Stick to Epsom salt if possible.
Tip: Avoid covering the stump with soil to “speed things up.” That only keeps it hidden, not decomposed, and you’ll still have a rock-hard chunk under your lawn months later.
How to Do It
- Drill deep holes into the top of the stump, 1 inch wide and 8 inches deep.
- Fill each hole with Epsom salt (or white vinegar if you prefer).
- Add warm water to dissolve the salt or soak the wood.
- Cover with a tarp or garbage bag and secure it with rocks or bricks to block sunlight and retain moisture.
- Reapply salt or vinegar every few weeks. Over time, the wood will dry, crumble, and start to rot. Once soft enough, chop out what remains.
What to Watch Out For
This approach is safe but extremely slow. Depending on weather and wood density, full decay may take months. Still, it’s one of the most affordable and low-effort stump removal techniques out there.

Burning a Stump
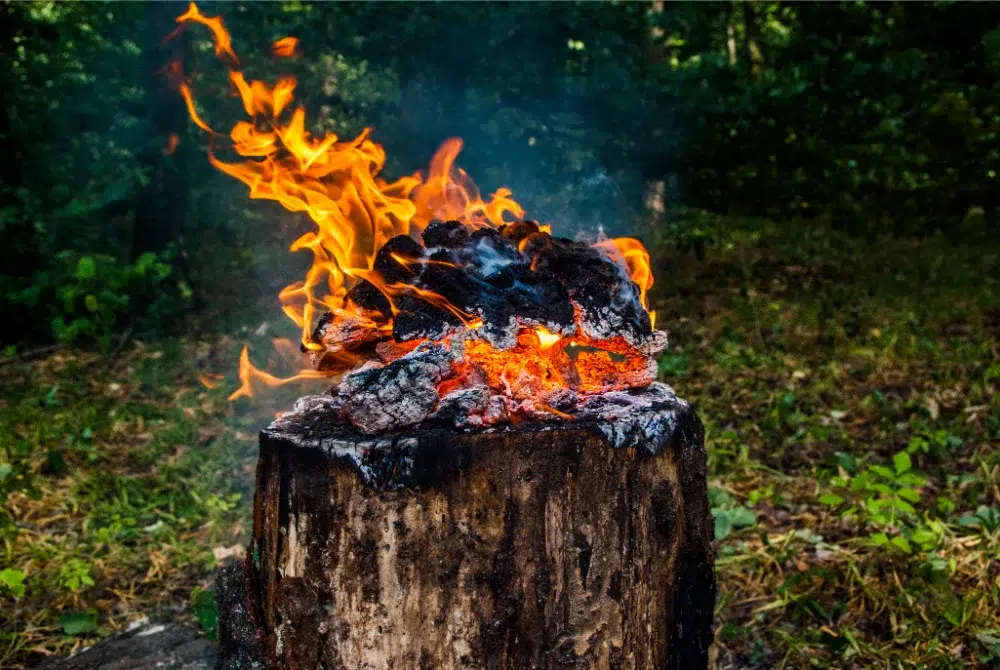
For those who like fast, dramatic results (and who live somewhere that won’t fine you for open flames), burning is another DIY stump removal option, but it’s not something to take lightly. Fire and roots have a habit of traveling underground, so this approach demands patience, preparation, and a few days of keeping watch.
Best Used For
Tools You’ll Need
How to Do It
- Drill holes about 8 inches deep across the top of the stump and into large roots. Space them a few inches apart to allow air and fuel flow.
- Add a stump remover first (a potassium nitrate product like Spectracide or Bonide). Fill each hole with granules, add water, and let it sit for several days to soften the wood. This makes the burn easier and more controlled.
- Soak with kerosene, pouring slowly so it absorbs instead of running off. Avoid gasoline completely, it’s too volatile and unsafe for this purpose.
- Clear a safe radius of at least 10 feet around the stump, removing leaves, sticks, or anything flammable.
- Ignite carefully and monitor it from a safe distance. The stump will smolder slowly, sometimes for days. Do not leave it unattended.
- Maintain barricades or a clear barrier around the area to prevent anyone or anything from walking near the embers. Even when the visible flame is gone, underground roots can keep burning.
What to Watch Out For
If this sounds like more trouble than it’s worth, you’re not wrong. Burning is effective, but it’s the messiest, riskiest DIY stump removal option. Only use it if you can commit to close supervision and full cleanup afterward.
Methods That Don’t Work (and Why to Avoid Them)
A few DIY stump removal tricks sound good online but are mostly a waste of time or risky to attempt. Here’s what to skip:
Avoid these shortcuts if you actually want results (and to keep your eyebrows intact).
Next up, we’ll look at common challenges people face when taking on DIY stump removal, plus when to admit defeat and call in an expert.
Common Issues & best Solutions
Even the best-planned DIY stump removal project can surprise you halfway through. Roots that won’t quit, tools that bend before the wood does, or a stump that refuses to budge — it’s all part of the experience. Here’s what usually goes wrong and how to stay one step ahead.
1. The Stump Is Too Large or Deeply Rooted
Some stumps, especially from mature hardwoods like oak or maple, are absolute beasts. The deeper and wider the root system, the harder the job.
2. Dull Tools or Wrong Equipment
Blunt blades, weak saws, or shovels not meant for heavy roots will make the job twice as long and twice as frustrating.
3. Hitting Underground Utilities
This one’s not just inconvenient, it’s dangerous. Water, gas, and electrical lines can all run under your yard.
4. Roots That Regrow
Some species, like poplar or willow, can send up new shoots from root fragments. Just when you think you’ve bested a stubborn stump, six months later it grows anew.
5. Soil Collapse After Removal
Once the stump and roots decompose, the ground can settle unevenly, especially if you didn’t fill the hole properly.
6. Fire Hazards (If Burning)
Even a small burn can smolder underground for days. That’s how you accidentally barbecue your septic system or melt your sprinkler lines.
When to Call a Professional
Sometimes the smartest part of DIY stump removal is knowing when not to keep doing it yourself. If the job starts to feel like a wrestling match with nature, it’s probably time to let the pros handle it. Here’s when you should step back and make the call:
Our Stump Removal Methods
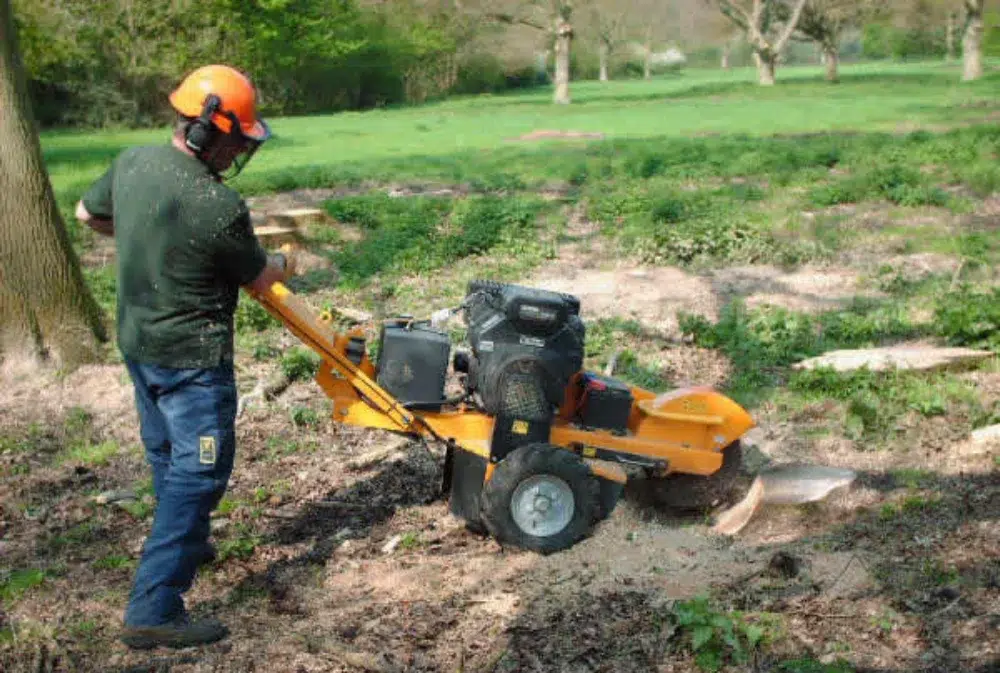
At Spinblade Tree Services, we take a careful, professional approach to stump removal to ensure it’s done safely, efficiently, and with minimal impact on your property. Proper removal goes beyond getting rid of a stump, it prepares your yard for new landscaping, prevents regrowth, and protects the surrounding soil and structures.
Learn more about our professional stump removal services and see why homeowners trust Spinblade for safe, thorough, and efficient yard care.
How Much Does Stump Removal Cost?
Whether you tackle a stump yourself or hire a professional, costs of stump removal can vary depending on size, location, and method. For DIY stump removal, manual digging and cutting usually costs $50–$150 for tools and protective gear. Chemical treatments are inexpensive, about $15–$30 per stump, though you may also need drills or tarps. Renting a stump grinder is typically $100–$200 per day, but remember — these machines are heavy, fast, and require proper safety equipment.
Hiring a professional is more expensive upfront but often saves time and ensures safety. Stump grinding services usually run $150–$500 per stump, while full removal — including digging and grinding for large or awkward stumps — can exceed $600. Prices are affected by factors like stump size, root spread, accessibility, and cleanup requirements.
FAQ: Tree Stump Removal
Here are answers to common questions about DIY Stump Removal that aren’t fully addressed in the main text:
In Short,
DIY stump removal can be a rewarding project if you know what you’re doing, but it’s certainly not without challenges. From understanding which techniques work best to knowing when to call in the pros, each stump presents its own set of obstacles. Whether you choose manual digging, chemical treatment, natural rotting, or burning, careful planning and safety are key to success. And when the job gets too big or tricky, calling a professional ensures it’s done quickly, safely, and without extra stress.
Tired of tripping over that tree stump?
From identifying root depth to offering tailored removal methods, we’ll help you make your yard hazard-free. Contact us today and turn your frustration into results.