

Espalier pruning is a tree training technique that combines practicality and art. It’s used to guide branches into flat, decorative patterns, perfect for tight spaces, productive fruiting, or garden design. This article explains what espalier pruning is, why it matters, how to do it, and what tools you’ll need to succeed. Whether you’re a backyard gardener or a design-focused landscaper, this guide covers everything you need to get started.
What Is Espalier Pruning?
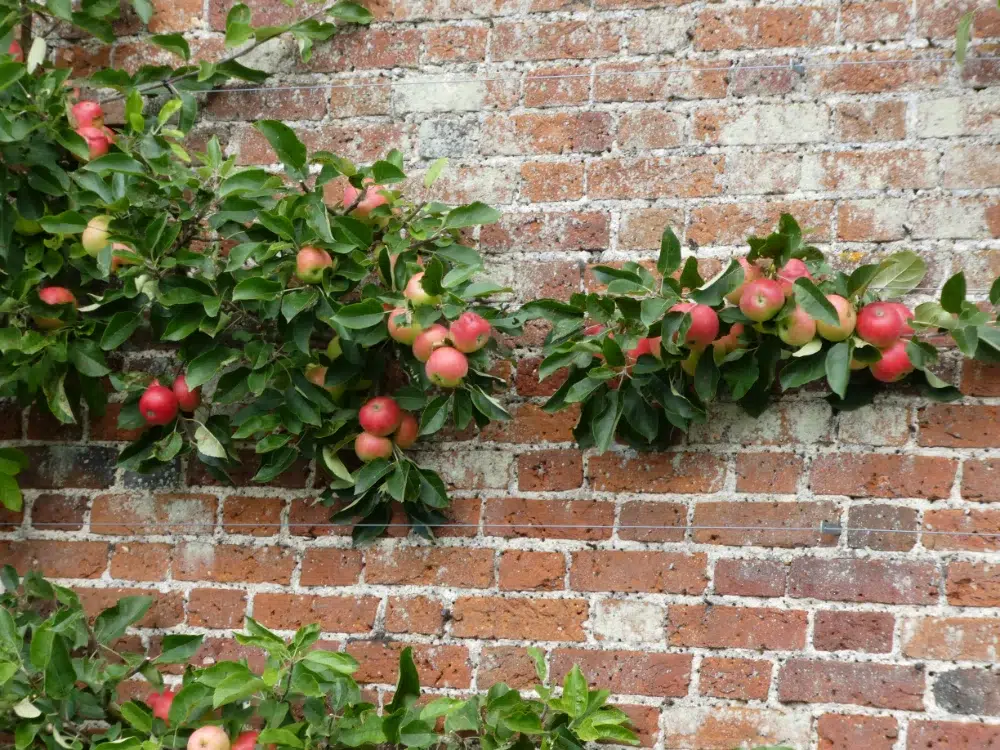
Espalier pruning is the tree pruning method of shaping trees to grow flat against a wall, fence, or frame.
Today, espalier pruning is popular in residential landscaping, urban farming, and decorative horticulture. It’s ideal for gardeners who want to grow fruit trees in narrow spaces or against hard surfaces without sacrificing aesthetics. From backyard apple trees to ornamental pears lining a courtyard wall, espalier creates structure and order in places where space is limited.
What Results Can You Expect from Espalier Pruning?
Espalier pruning is not just about aesthetics, it delivers practical, measurable outcomes that are specific to its technique of training trees into flat, two-dimensional forms. Here are the concrete results and benefits you can expect:
- Consistent Fruit Production Along Trained Branches
→ Espaliered trees direct energy into spur development, resulting in concentrated fruiting zones along the horizontal arms. - Earlier Fruit Bearing (1–2 Years Sooner)
→ Because growth is tightly controlled, many espaliered apple and pear trees begin fruiting 1 to 2 years earlier than untrained trees. - Improved Fruit Quality Through Uniform Sunlight Exposure
→ The flat structure ensures even light distribution across all branches, which leads to more evenly ripened, higher-quality fruit. - Efficient Use of Nutrients and Energy
→ With fewer vertical shoots and less unnecessary wood, the tree diverts more resources to fruit and spur development rather than excessive canopy growth. - Reduction in Disease and Pest Pressure
→ Better air circulation between branches reduces humidity, which helps prevent fungal diseases like apple scab and pest infestations such as aphids or codling moth. - Long-Term Structural Control and Tree Longevity
→ Regular, targeted pruning minimizes stress on the tree and extends productive life, especially in controlled environments. - Higher Yields Per Linear Foot in Small Spaces
→ While overall yield per tree may be slightly lower, espalier allows multiple trees in a small area, increasing yield per square meter, ideal for urban or intensive gardens.
Best Trees and Plants for Espalier Pruning
Espalier pruning works best on certain trees that respond well to regular shaping and directional growth. Not all trees are suitable, so choosing the right type is essential for success—whether you’re aiming for ornamental appeal or increased fruit production.
| Tree/Plant Type | Suitability | Why It Works / Doesn’t Work |
|---|---|---|
| Apple Trees | Ideal | Flexible branches, spur-bearing, responds well to training, and produces fruit on short shoots. |
| Pear Trees | Ideal | Similar to apples; they adapt well to structured pruning and produce high fruit yields. |
| Fig Trees | Very Good | Soft wood and fast growth make them easy to train along flat surfaces. |
| Plum Trees | Moderate | Can work, but growth is vigorous and may require frequent pruning to maintain shape. |
| Citrus Trees | Good | Dwarf varieties are especially suitable; need warm climates and support. |
| Cherry Trees | Limited | Often produce fruit on long shoots; can be trained but require expertise to maintain structure. |
| Camellias | Ornamental | Evergreen, respond well to shaping, ideal for decorative espalier on walls or fences. |
| Magnolia Trees | Not Suitable | Brittle wood, slow growth, and poor response to repeated pruning. |
| Conifers (e.g., Pine) | Not Suitable | Poor regenerative ability, rigid structure, and unsuitable growth pattern. |
| Maple Trees | Not Ideal | Fast-growing with poor response to directional pruning; not easily shaped. |
How to Get Started with Espalier Pruning
Ready to try it? This section covers everything you need to set up your espalier system correctly, from choosing the tree and shape to building your support structure.
Tools You’ll Need
Before making any cuts, gather the right tools. Clean, sharp instruments help avoid damaging bark and ensure clean healing.
- Bypass pruning shears: for precise cuts on small branches
- Loppers: for thicker limbs
- Training ties or garden wire: to hold branches in position
- Trellis, fence, or tension wire: your training surface
- Protective gloves: essential for safety
Choosing the Right Tree
Not every tree is suited to espalier pruning. Choosing the right species and starting at the right time makes a huge difference.
When it comes to espalier pruning, young, flexible trees are key. The ideal candidate should have strong lateral branching potential and respond well to directional training. Look for 1–2-year-old bare-root or container trees with a single, straight central leader and no heavy branching yet. This gives you more control in shaping the form from the ground up.
Best Tree Types for Espalier:
- Apple (Malus domestica): The most popular espalier tree. Apples are naturally spur-bearing, meaning they grow fruit on short, stubby side branches, perfect for compact forms.
- Pear (Pyrus communis): Similar to apples but slightly more upright in growth. Great for colder climates.
- Fig (Ficus carica): Grows quickly and responds well to pruning. Works well in fan shapes.
- Quince (Cydonia oblonga): Smaller than apple or pear and highly decorative.
- Stone fruit (e.g., plum, cherry): Can work with extra care, but these tend to need more frequent pruning and don’t always spur well.
If you’re working in a space with foot traffic underneath, like along a walkway or fence line, look for a tree with a naturally high branching point. While espalier typically limits vertical growth, some initial crown raising may help create cleaner lines at the base or improve clearance where needed.
Choosing an Espalier Shape
The shape you choose will guide every cut, tie, and support decision you make. This section outlines the most common espalier forms and which situations they’re best suited for.
Before you start building your support system or pruning branches, decide which espalier pruning shape you want to achieve. This isn’t just about aesthetics, it affects how your tree will grow, how much space it needs, how easy it is to maintain, and whether it will produce fruit efficiently.
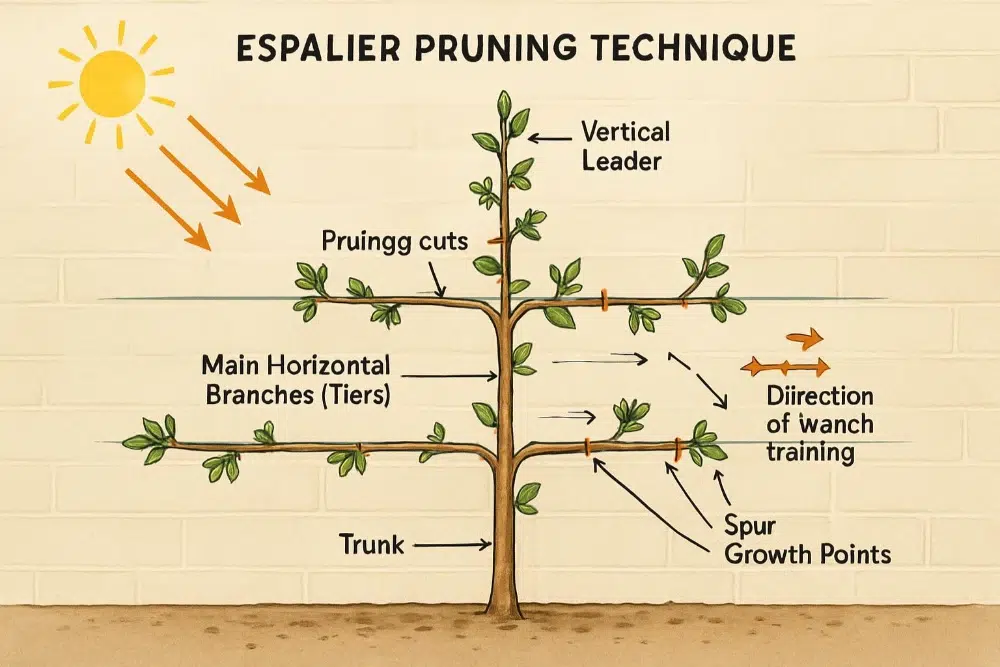
1. Horizontal Tiers (Palmette Horizontal)
This is the most traditional espalier form and one of the easiest to learn. It involves growing the tree in symmetrical horizontal arms at evenly spaced levels, like a layered “T” or ladder. Best used for:
- Apples and pears
- Structured garden layouts
- Maximum fruit production
- Tight spaces (walls, fences)
Why choose it:
It produces a neat, orderly appearance and allows even light distribution. Since apple and pear trees naturally produce fruit on spurs close to the branch, this form maximizes yields.
2. Fan Shape (Palmette Oblique or Oblique Cordon)
In this shape, branches radiate diagonally outward like an open fan, without a central leader. It requires more precise pruning but allows flexibility in irregular spaces. Best used for:
- Figs, peaches, plums
- Uneven walls or trellises
- Warmer climates with vigorous growth
Why choose it:
Ideal for species that bear fruit on newer wood and don’t develop strong central trunks. It’s also more adaptable when space is limited vertically but wide horizontally.
3. Candelabra / Belgian Fence
This decorative form features multiple vertical limbs rising from horizontal base branches or angled outward in repeating patterns. The Belgian Fence is a classic example, often seen with crossing V-shapes forming diamond patterns. Best used for:
- Ornamental impact
- Pathway dividers or symmetrical plantings
- Gardeners with time and precision
Why choose it:
This is the most visually dramatic option and works beautifully as a statement feature. It requires more trees (often planted in a row) and tight spacing but delivers stunning structure.
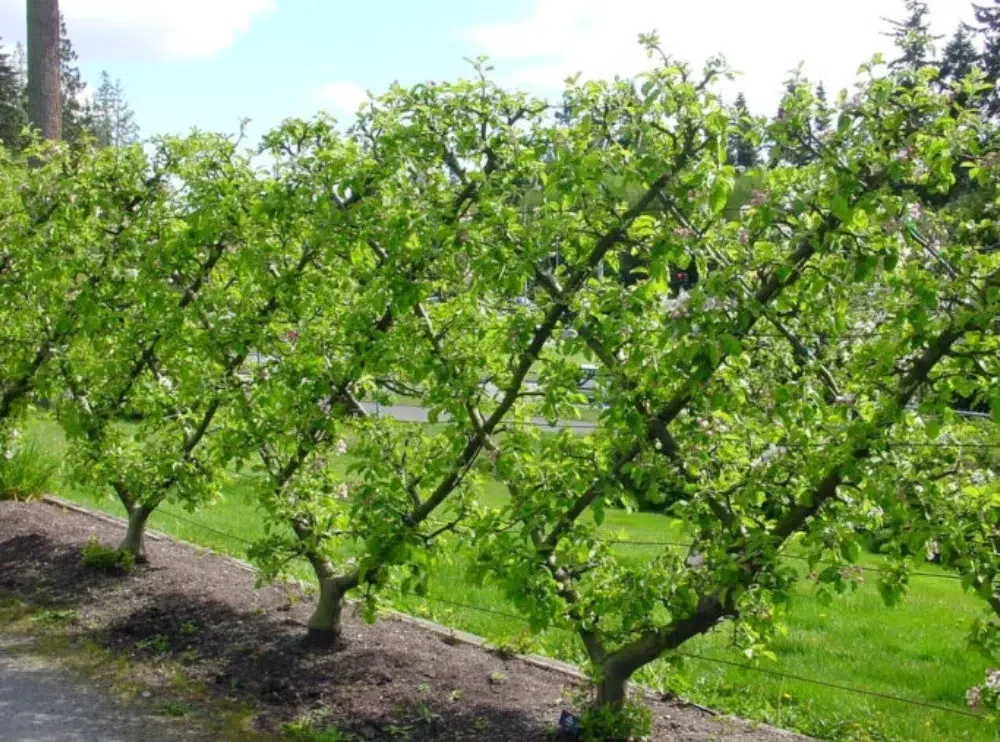
4. Informal / Free-form Espalier
Instead of following strict lines, this method trains the tree into more natural, loose shapes, still flat, but less geometric. Best used for:
- Ornamental trees
- Relaxed garden aesthetics
- Beginner gardeners
Why choose it:
It’s lower-maintenance and forgiving if you miss a pruning window. Great for flowering trees or creating privacy screens that don’t require fruiting precision.
Setting Up the Structure
Support is everything in espalier pruning. A strong frame will guide the shape and support the tree for years.
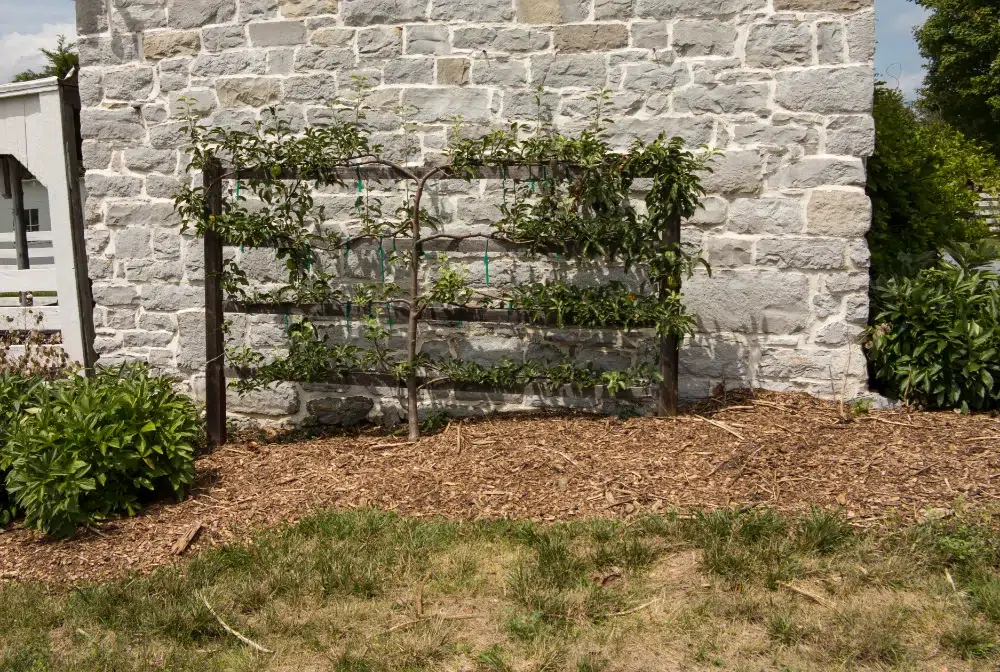
Start by choosing where the tree will grow: against a wall, fence, freestanding trellis, or wire frame. The structure needs to be sturdy enough to hold the weight of branches, leaves, and eventually fruit.
Surface Options:
- Brick or wood walls: use screw hooks or masonry anchors to install wire guides.
- Fences: work well if reinforced with horizontal battens.
- Freestanding trellises or posts: ideal if no wall is available.
Wire Setup (Standard Horizontal Tiers):
- Wire 1: 18″ above the soil line
- Wire 2: 12–18″ above Wire 1
- Wire 3+: Keep spacing consistent as the tree grows
Use galvanized wire or weatherproof garden wire. Stretch it tight and fasten it securely, slack wires will sag and distort your tree’s shape.
Espalier Pruning: Step-by-Step Training Process
With your framework in place, it’s time to start shaping your tree. Here’s a detailed breakdown of the espalier pruning process, season by season and tier by tier.
Start with your newly planted tree, ideally dormant in early spring or late fall. If it has no side branches yet, make a heading cut just above the first wire. This encourages buds below the cut to form lateral shoots, these will become your first tier.
1. Cut the central leader 1–2 inches above the first wire
This initial heading cut is what triggers lateral (side) growth. By removing the terminal bud, the dominant growth point at the top, you signal the tree to redirect energy into buds along the stem below the cut. These buds will soon sprout into side shoots, some of which can be trained horizontally.
How to do it:
- Identify the central stem (also called the central leader).
- Locate a bud or node just above your first horizontal wire.
- Using sharp, clean bypass pruners, make a slightly angled cut just above that bud (1/4”–1/2” spacing is ideal).
- The cut should angle away from the bud, allowing water to drain and preventing rot or fungal entry.
This should be done either immediately after planting (if dormant) or in late winter/early spring before the buds swell.
2. As buds develop, choose two opposing lateral branches that line up well with the wire
These two branches will form your first espalier “tier”, the main arms growing outward along the wire in both directions. If chosen well, they’ll give the tree a strong, symmetrical base.
How to choose the right branches:
- Monitor the tree as it breaks dormancy and begins to push out new shoots (this usually starts within a few weeks of that first heading cut).
- Look for two lateral shoots that:
- Emerge from opposite sides of the trunk
- Are located close to (or just above) the first horizontal wire
- Are strong, healthy, and growing with decent spacing from other shoots
If no two shoots emerge directly across from each other, it’s okay to select two that are slightly staggered vertically and gently angle them toward the wire.
Don’t rush this step, wait until the shoots are at least 6–8 inches long before selecting and removing the rest.
Want Fruit Trees That Double as Art?
Let our team turn your apple or pear trees into living sculptures with expert espalier pruning. rom custom structure design to seasonal shaping, we handle every step, so you get stunning results without the sweat.
3. Remove all other shoots and secure your chosen two with soft garden ties
Removing the extra shoots ensures the tree channels its energy into the two main arms instead of wasting resources on vertical or unneeded growth. Proper tying starts the training process and teaches the branches where to grow.
How to do it:
- Use clean, sharp shears to snip off all other shoots that aren’t part of your tier. Cut close to the trunk but avoid damaging the bark.
- Use soft, stretchable ties (e.g., rubber-coated plant wire, cloth strips, or Velcro plant tape) to secure the two selected laterals to the wire.
- Tie in loose loops, you want support without constriction. Make sure the tie forms a figure-eight: one loop around the branch, one around the wire, with a twist in the middle.
Important: Avoid rigid materials like string, zip ties, or anything that can dig into the bark over time.
4. Continue training these laterals outward along the wire, adjusting ties every few weeks
Trees don’t naturally grow in flat horizontal lines. Continuous, gentle training ensures the branches stay close to the wire without snapping or curving awkwardly. Over time, the wood lignifies (hardens), locking the shape in.
How to do it:
- Check the tree every 2–3 weeks during the growing season.
- As the branches lengthen, reposition your ties farther out along the wire to keep the growing tips secured.
- If a branch is resistant or stiff, gently bend it a little at a time over several weeks. Don’t force it all at once, it may snap.
- Remove or replace older ties as needed to prevent girdling.
Target shape: A clean, horizontal line extending from both sides of the trunk, anchored to the wire like a “T”.
5. Once the first tier is filled (approx. one growing season), let the central leader grow up to the second wire and repeat the process
Once the base tier is established, you’ll begin building the next tier upward. The process is essentially repeated, creating structured, layered growth over several years.
How to do it:
- Let the central leader grow vertically until it reaches just above your second horizontal wire.
- Repeat the same process:
- Cut the central leader just above the second wire
- Let new lateral shoots develop
- Select two opposite shoots for the second tier
- Tie them to the second wire, and remove the rest
You can repeat this process up to 3–4 tiers depending on your tree’s vigor, available vertical space, and intended final shape. Just make sure there’s enough spacing (12–18″) between each wire to allow for fruiting and airflow.
Seasonal Maintenance and Common Mistakes
Once your espalier form is established, ongoing care is key. This section explains how to maintain shape and productivity year-round, and what not to do.
Seasonal Maintenance and Common Mistakes
Espalier pruning doesn’t end after the first cut. Regular attention keeps the structure intact and the tree productive.
Summer Pruning (June–August):
- Trim back vertical shoots growing from lateral branches (“watersprouts”) to 2–3 leaves long
- Remove any suckers from the rootstock or lower trunk
- Tie new growth as needed to maintain spacing
- Thin excess clusters on fruiting branches to reduce weight and encourage quality fruit
Winter Pruning (Late Nov–Early March):
- Shape the permanent structure, cut back lateral branches to encourage spurs
- Remove any dead, damaged, or crossing limbs
- Review tree shape, adjust or remove ties to avoid girdling
- Shorten side shoots to 3–5 buds to stimulate flower bud development
Ongoing Support Care:
- Inspect wires and trellis connections every season
- Loosen ties that are too tight or digging into the bark
- Reapply mulch (keeping it 2–3 inches away from the trunk)
Expect full structure development to take 3–5 years. After that, maintenance gets easier, mostly minor pruning and tie adjustments.
Common Mistakes to Avoid
Even with the right setup and intentions, espalier pruning can go wrong if you overlook a few key principles. Here are the most frequent errors to watch for.
Final Notes on Timing & Patience
Espalier pruning is not about instant results, it’s a slow, sculptural process. Here’s a rough timeline:
| Year | What to Expect |
|---|---|
| 1 | Planting, heading cut, first tier selection |
| 2 | Training first tier, start second tier setup |
| 3 | Fill in second tier, light fruiting may begin |
| 4+ | Refine shape, prune for productivity and design |
Now that you’re aware of the most common pitfalls, you’re better equipped to prune with purpose. Espalier pruning isn’t just about shaping, it’s about working with your tree over time, understanding its rhythms, and avoiding shortcuts that could undo months (or years) of progress.
FAQ: Espalier Pruning
Still wondering if espalier pruning is the right fit? These quick answers cover a few more things that might not have come up earlier in the guide.
In Short,
Espalier pruning combines horticultural technique with artistic expression, creating trees that are both productive and visually striking. With the right tree, structure, and long-term care, you can shape your landscape in a way that maximizes beauty and utility. Whether you’re training a fruit-bearing apple along a wall or creating a decorative privacy screen, espalier pruning opens up new possibilities for tree management in small or structured spaces.
Want Fruit Trees That Double as Art?
Let our team turn your apple or pear trees into living sculptures with expert espalier pruning. rom custom structure design to seasonal shaping, we handle every step, so you get stunning results without the sweat.