

Pruning is one of the most important things you can do for a tree, and one of the easiest to get wrong. Knowing the right tree pruning techniques, and when each one actually applies is what separates a cut that helps a tree from one that damages it for years. This guide answers what are the different types of tree pruning available, how to choose between them, and where the cut itself should be made.
What Is Tree Pruning?
What is pruning, exactly? Tree pruning is the selective removal of specific branches to improve a tree’s health, structure, and safety, and what is the difference between tree trimming and pruning comes down to that same health-versus-appearance split. Pruning explained simply: it’s a set of distinct tree pruning methods, each solving a different problem, which is exactly why arborist pruning techniques vary so much from one job to the next.
The 10 Tree Pruning Techniques
Different pruning techniques exist because different problems need different solutions, not a single default cut. These 10 types of tree pruning techniques, the real pruning styles a certified arborist actually uses, each target a specific outcome, and proper pruning techniques start with knowing which is which.
1. Crown Thinning
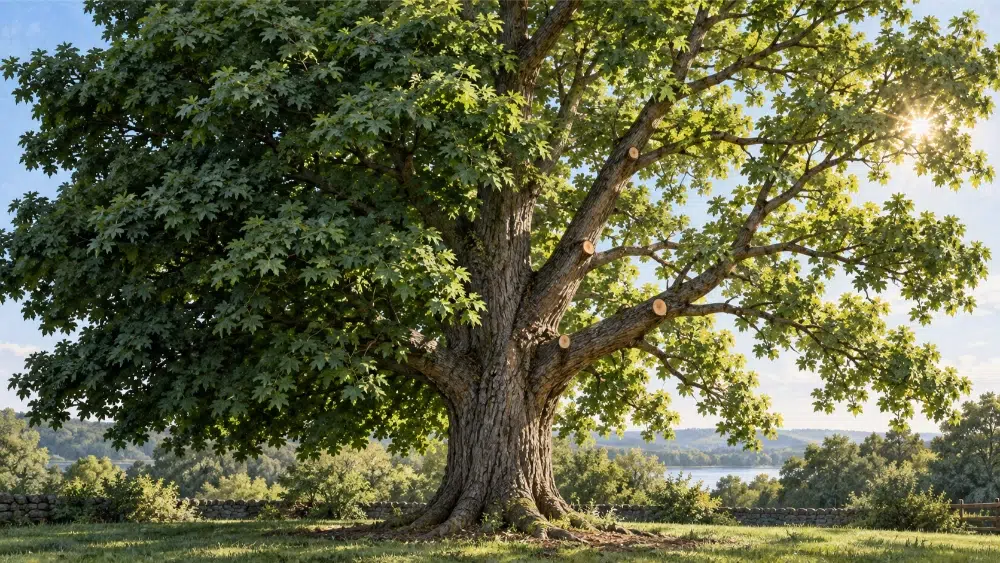
Crown thinning selectively removes interior branches to reduce canopy density without shrinking the tree. It’s the clearest answer to how to prune trees to reduce wind resistance, since more light and airflow through the crown lowers storm risk while leaving the tree’s natural shape untouched.
When to Use It:
- Dense canopies blocking light to plants or turf below
- Trees exposed to high wind or storm-prone sites
- Mature trees due for routine maintenance
- Canopies where poor airflow is raising fungal disease risk
When Not to Use It:
- Trees already sparse, stressed, or newly transplanted
- As a substitute for correcting a structural defect
- On young trees still establishing their scaffold branches
- When more than a quarter of the canopy would need removal to see a real effect
How to Do It:
- Remove small, weak, or crossing interior branches first
- Never remove more than 20–25% of the live canopy in one session
- Space cuts evenly through the crown rather than concentrating them on one side
- Cut back to a lateral branch or just outside the branch collar, never leaving a stub
Trees It’s Good For:
- Mature deciduous shade trees
- Trees in exposed, windy locations
2. Crown Raising
Crown raising, sometimes called raise canopy work, removes lower branches to create clearance beneath the canopy. It’s one of the most common tree pruning techniques in urban settings, where trees need to coexist with sidewalks, driveways, and signage.
When to Use It:
- Branches overhanging walkways, driveways, or parking areas
- Signage, streetlights, or sightlines blocked by low limbs
- Vehicles or pedestrians regularly brushing against low growth
- Undergrowth beneath the tree needs more sunlight
When Not to Use It:
- Young trees still developing their lower scaffold branches
- When it would push the live crown below two-thirds of total height
- Trees already stressed from drought, disease, or a recent transplant
- As a way to compensate for a tree planted too close to a structure
How to Do It:
- Identify branches blocking pathways, driveways, or sightlines
- Remove no more than one-third of the live crown’s lower branches in a single session
- Keep the live crown at least two-thirds of the tree’s total height
- Spread larger reductions across multiple seasons rather than cutting it all at once
Trees It’s Good For:
- Street and boulevard trees
- Trees near parking areas
3. Crown Reduction
Crown reduction decreases a tree’s overall size while preserving its natural form. Unlike topping, it cuts back to lateral branches capable of taking over as the new growth point, which is the correct, ISA-approved way to manage a tree that has outgrown its space.
When to Use It:
- Trees encroaching on buildings, rooflines, or power lines
- Trees that have outgrown their planting site
- Situations where topping has been suggested — reduction is the correct alternative
- Older trees needing weight taken off heavy, overextended limbs
When Not to Use It:
- Trees already stressed by drought, disease, or root damage
- When crown thinning alone would solve the actual problem
- On young trees still establishing structure
- As a quick fix instead of planning for eventual removal on a badly sited tree
How to Do It:
- Cut back to a lateral branch at least one-third the diameter of the limb removed
- Keep the reduction balanced across the canopy, not concentrated on one side
- Never remove more than 25–30% of the canopy in one session
- Spread significant size reductions across multiple seasons
Trees It’s Good For:
- Ornamental trees near structures
- Trees requiring size control without full removal
Do you Need Tree pruning Services?
Dead branches can fall without warning, causing damage or injury. Our expert team safely prune your trees to protect your trees, and everything beneath them.
4. Crown Cleaning & Deadwooding
Of the ten tree pruning techniques, crown cleaning and deadwooding are the most routine: crown cleaning removes dead, dying, or diseased branches throughout the canopy, and deadwooding is its most focused form. Together they’re the foundation of routine tree care, reducing hazard risk and slowing the spread of decay.
When to Use It:
- Routine annual or biannual maintenance on any tree
- Immediately after storm damage to remove broken or hanging limbs
- When fungal growth, cavities, or pest activity is visible
- As a standard first step before applying any other technique
When Not to Use It:
- On branches that are simply bare in winter, not actually dead
- As the only maintenance a structurally unsound tree receives
- Without first assessing whether the whole tree needs removal instead
- On green wood mistaken for dead wood, check for live buds first
How to Do It:
- Identify branches showing decay, disease, dieback, or structural weakness
- Cut just outside the branch collar to support proper wound closure
- Remove only compromised wood — don’t take healthy branches while you’re up there
- Sanitize tools between cuts on diseased material to avoid spreading infection
Trees It’s Good For:
- Older, mature trees
- Any tree after storm damage
5. Structural Pruning
Structural pruning answers how to prune a young tree for structural integrity, guiding it toward a strong central leader and well-spaced scaffold branches rather than shaping its present look. Investing in this early dramatically reduces the corrective pruning a tree needs later.
When to Use It:
- Newly planted or young trees within their first decade
- Trees showing early co-dominant stems or crowded branch spacing
- Nursery stock that was poorly structured before planting
- Any planting where long-term storm resilience is a priority
When Not to Use It:
- Mature trees whose branch structure is already established
- As corrective surgery on a tree that’s simply too far gone
- Without a multi-year plan, since one session isn’t enough
- On species with a naturally multi-stemmed growth habit by design
How to Do It:
- Begin within the tree’s first 3–5 years, while cuts are still small
- Favour one dominant central leader, removing competing co-dominant stems
- Space scaffold branches vertically and radially so none grows directly above another
- Remove branches with narrow, V-shaped attachment angles below roughly 30 degrees
Trees It’s Good For:
- Young trees in their first 5–10 years
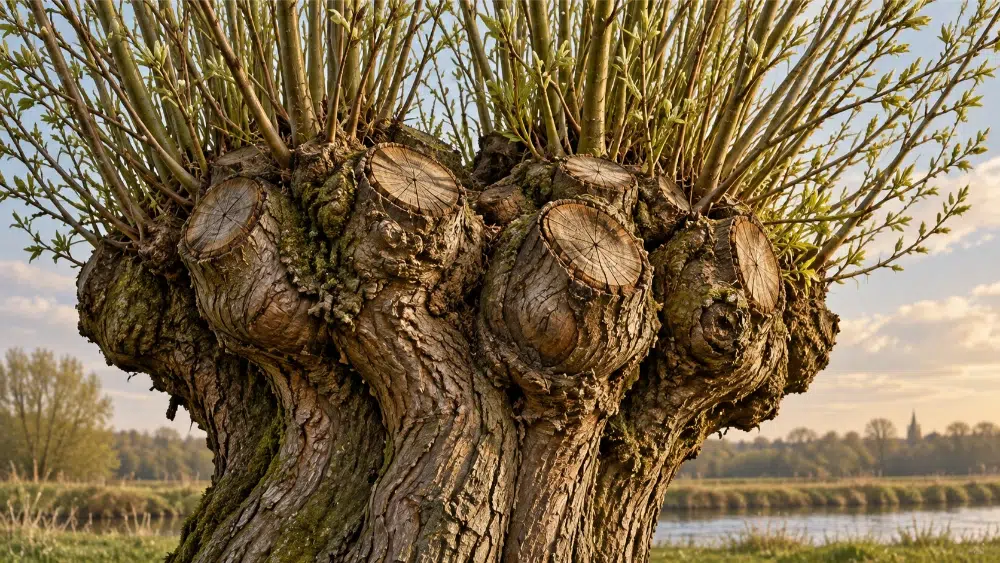
6. Pollarding
Pollarding cuts a tree’s upper branches back to a set point repeatedly over time, producing a dense cluster of new growth each cycle. It’s a long-term commitment, once started, it must continue, or heavy limbs develop and stress the tree.
When to Use It:
- Urban trees that must stay a fixed size near structures or utilities
- Species like willow that regenerate readily from repeated cuts
- Streetscapes where consistent, compact canopies are required
- Sites where full removal isn’t an option but unlimited growth isn’t either
When Not to Use It:
- Mature trees never previously pollarded
- Species that don’t regenerate well from heavy repeated cuts
- Anyone unwilling to commit to an annual or biannual cutting schedule
- As a one-time fix rather than an ongoing maintenance commitment
How to Do It:
- Begin while the tree is young, ideally within its first two years
- Cut all branches back to the same pollard head each cycle
- Repeat every one to two years without skipping a cycle
- Never cut into older wood beyond the established pollard point
Trees It’s Good For:
- Willows and similarly fast-regrowing species
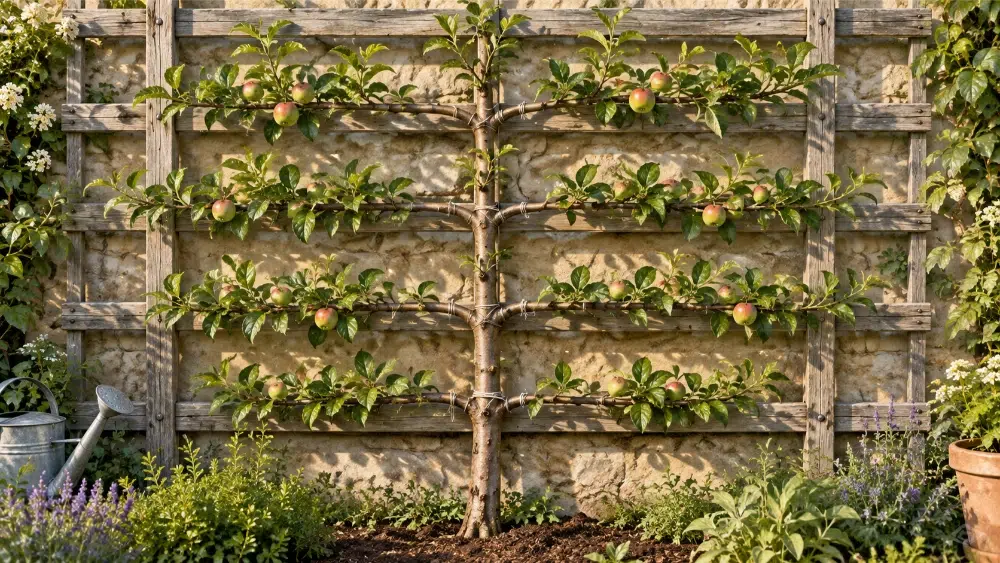
7. Espalier Pruning
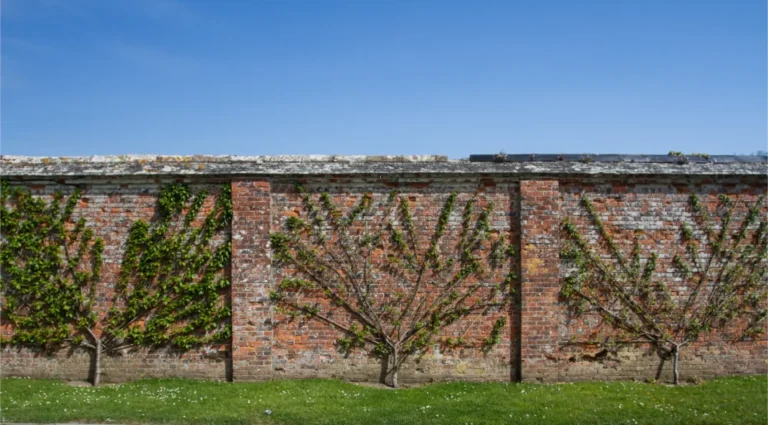
Espalier pruning trains a tree to grow flat against a wall or trellis in a deliberate, two-dimensional form. It’s common in orchards and small gardens, where it maximizes fruit exposure to sunlight in limited space.
When to Use It:
- Small gardens or narrow spaces without room for a full canopy
- Orchards prioritizing fruit yield and sun exposure
- Decorative landscaping trained against a wall or fence
- Fruit trees where hand-harvesting ease matters
When Not to Use It:
- Without a wall, fence, or trellis to train against
- On species that don’t tolerate heavy, repeated shaping
- If ongoing seasonal maintenance isn’t realistic
- On a tree already mature with an established natural form
How to Do It:
- Train primary branches early into the desired pattern, horizontal, fan, or palmette
- Attach branches to wires or a trellis spaced roughly 12–18 inches apart
- Remove any shoots growing forward, backward, or outside the intended plane
- Prune consistently through the growing season to redirect energy into the trained form
Trees It’s Good For:
- Fruit trees like apple and pear
8. Topping ‘And Why You Should Never Do It’
To explain pruning techniques honestly, one of the ten has to be named as what not to do: topping indiscriminately cuts large branches to stubs to quickly reduce a tree’s size. It is not a recognized tree pruning technique, the ISA condemns it, since the rapid, weakly attached regrowth it causes is far more dangerous than the branches it replaced.
Why It’s Never the Answer:
- Large, flat cuts can’t seal properly, leaving the tree exposed to decay for years
- The tree responds with dense, weakly attached epicormic growth prone to failure
- Removing a large share of the canopy at once starves the tree’s ability to photosynthesize
- Topped trees rarely recover their natural form and often need removal within a few years
What to Request Instead:
- Crown reduction for size control
- Crown raising or directional pruning for clearance concerns
9. Vista Pruning
Vista pruning selectively removes branches to open or restore a specific sightline. Unlike most techniques, it balances aesthetics with tree health, aiming to improve a view while minimizing the impact on the tree itself.

When to Use It:
- Scenic waterfront, hillside, or elevated properties
- Views blocked gradually by years of unmanaged growth
- Windows, patios, or focal points obstructed by canopy
- Properties where value is tied to a specific outlook
When Not to Use It:
- When the desired view would require removing a large share of the canopy
- On a tree already weakened or structurally compromised
- As a substitute for a proper crown reduction if size is the real issue
- Without considering whether a neighbouring tree could achieve the same result with less cutting
How to Do It:
- Stand at the exact point where the view needs to be restored before cutting anything
- Identify the minimum number of branches that achieve the sightline
- Remove selectively from multiple trees if needed, rather than over-cutting one
- Cut at the branch collar to support healthy regrowth and future shape
Trees It’s Good For:
- Mature trees with removable lower or peripheral branches
10. Directional (Utility) Pruning
Among all the tree pruning techniques covered here, directional pruning is the one built purely around safety: it steers branch growth away from power lines and infrastructure. It’s a safety-first technique that keeps a tree alive and growing in a safer direction rather than removing it outright.
When to Use It:
- Trees near power lines, transformers, or utility poles
- Recurring conflicts between branch growth and infrastructure
- Municipal or commercial properties with utility corridors through the canopy
- Any tree flagged by a utility company for clearance work
When Not to Use It:
- Without utility provider coordination near live power lines
- As a DIY project — this work is for qualified professionals only
- On trees where the real solution is relocation or removal, not redirection
- If it would remove so much growth the tree becomes structurally unbalanced
How to Do It:
- Identify branches growing toward or already touching power lines or poles
- Redirect growth by cutting at lateral growth points, never leaving stubs
- Favour branches growing away from the utility corridor when selecting cuts
- Coordinate with the utility provider before any work near live lines
Trees It’s Good For:
- Trees planted near utility corridors
How to Choose the Best Technique
How to choose a pruning technique from the list above depends on the tree’s condition, your goal, and what’s actually causing the problem, and knowing where to cut when pruning a tree matters just as much as which technique you pick.
What to Look For Before Pruning
Before choosing a technique, look for the specific signs that point to it.
Where and How the Cut Is Made
A tree’s branch collar, the slightly swollen ring where a branch meets the trunk, contains the tissue responsible for sealing a wound; a flush cut that shaves this collar away removes exactly the defense the tree needs, letting decay travel straight into the trunk instead of stopping at the branch. Correct pruning cut placement always respects this collar.
The branch bark ridge, the raised line of bark just above the collar, is the visual cue arborists use to place the cut correctly when the collar itself is hard to see.
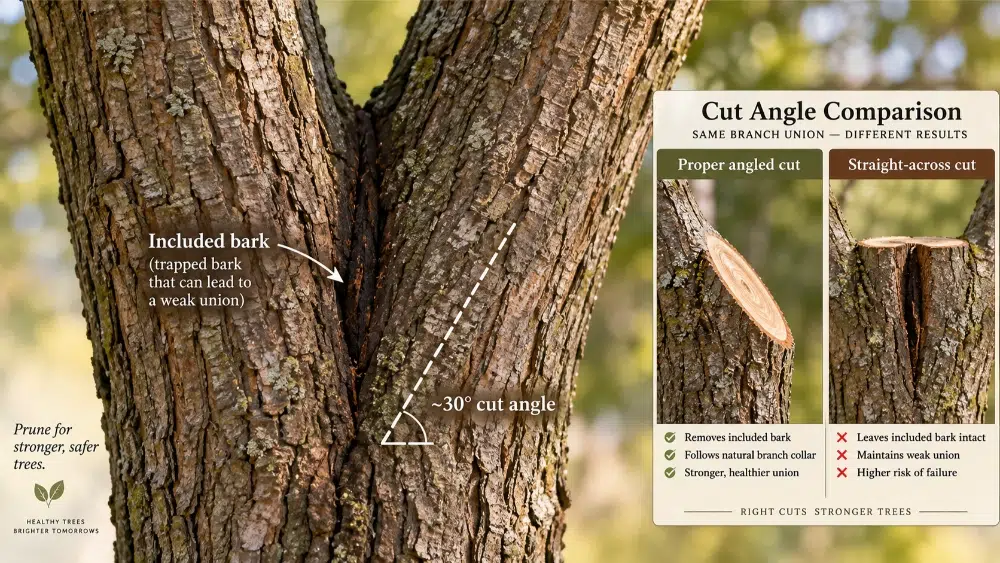
For branches too heavy to control by hand, the three-cut method prevents the bark from tearing: an undercut a few inches out, a second cut from the top to drop the weight, then a final cut just outside the collar. Removing a V-shaped crotch, where bark gets trapped between two upright branches and creates a weak, failure-prone attachment, follows a different angle: cut upward at roughly 30 degrees from the branch’s point of origin rather than straight across.
Match the tool to the branch: hand pruners for anything under an inch, loppers up to about an inch and a half, a pruning saw for branches up to six inches, and a chainsaw or pole pruner for anything larger or out of reach.
Per the City of Toronto’s own Tree Pruning Guidelines, crown reduction cuts must go back to a lateral branch at least one-third the diameter of what’s removed, the same ratio used throughout the techniques above. Once a cut is made, leave it alone: a tree seals a wound through compartmentalization, walling off decay internally, and sealants or pruning paste only trap moisture and interfere with that process rather than help it.
SpinBlade’s own pruning work is led by Cole Horton, a Certified Utility Arborist (CUA) who applies ANSI A300 cut-placement standards on every job, the same standard behind everything described here. In Ottawa specifically, the city’s Tree Protection By-law doesn’t require a permit to prune private trees, but expects the work to reflect good arboricultural practice, which is exactly what correct cut placement is.
The table below summarizes all 10 tree pruning techniques side by side, now that you know what to look for and where the cut belongs.
| Technique | Pros | Cons | Best For |
|---|---|---|---|
| Crown Thinning | Improves light and airflow | Over-thinning weakens the tree | Dense, mature canopies |
| Crown Raising | Clears space below the canopy | Too much at once stresses the tree | Urban and street trees |
| Crown Reduction | Controls size, keeps natural shape | Excess reduction causes weak regrowth | Trees near structures |
| Crown Cleaning | Removes hazards, improves health | Needs regular repeating | All trees, routine care |
| Structural Pruning | Builds long-term stability | Needs early intervention | Young trees |
| Pollarding | Controls size long-term | Requires ongoing commitment | Willows, urban plantings |
| Espalier | Maximizes space and fruiting | Labour-intensive | Fruit trees, small gardens |
| Topping | None | Weak, dangerous regrowth | Never recommended |
| Vista Pruning | Restores views carefully | Easy to over-prune | Scenic properties |
| Directional Pruning | Protects utility infrastructure | Needs regular follow-up | Trees near power lines |
Frequently Asked Questions
Conclusion
Choosing the right tree pruning techniques comes down to matching the method to the actual problem, not applying the same cut to every tree. Whether it’s crown cleaning for routine health or crown reduction for size control, the outcome always depends on correct cut placement and the judgment to know when a technique doesn’t apply.
If you’re unsure which of these tree pruning methods your tree needs, SpinBlade’s ISA-certified arborists in Ottawa can assess it directly.
Do you Need Tree pruning Services?
Dead branches can fall without warning, causing damage or injury. Our expert team safely prune your trees to protect your trees, and everything beneath them.