

Tree crown thinning is a targeted tree pruning technique that involves selectively removing branches within the canopy to improve airflow, light penetration, and overall tree health. Unlike heavy pruning methods, tree crown thinning maintains the tree’s natural shape while reducing density in a controlled way. This method not only enhances the structural integrity of the tree but also contributes to a healthier, more aesthetically pleasing landscape. In this article, you’ll discover when to use tree crown thinning, the tools required, and step-by-step guidance for executing it safely and effectively.
What Is Tree Crown Thinning?
Tree crown thinning focuses on reducing the density of a tree’s canopy by selectively removing branches without altering the overall shape or height. The goal is to create space between remaining branches, allowing more light and air to flow through. This pruning method is particularly useful for maintaining tree health, minimizing storm damage, and improving the appearance of the landscape.
Unlike crown reduction, which shortens branches to reduce height or spread, tree crown thinning preserves the tree’s original structure while alleviating overcrowding. Similarly, tree crown thinning is different fromtree pollarding, a more severe method that removes most of the crown, often changing the tree’s long-term growth pattern.

Signs Your Tree Needs Crown Thinning
Not every tree needs crown thinning, but certain signs make it clear when this pruning technique is beneficial. By learning to recognize these indicators, you can take timely action to improve your tree’s health, safety, and appearance. Below are the most common signs to watch for, and how to approach each one.
| Sign | What It Looks Like | How to Approach It |
|---|---|---|
| Dense Canopy Blocking Sunlight | The ground beneath the tree or nearby plants receive little to no sunlight. | Selectively remove smaller interior branches to allow more light, keeping the outer shape balanced. |
| Poor Air Circulation | Leaves stay damp after rain; signs of mildew or fungal issues appear. | Thin evenly across the canopy to improve airflow and reduce disease risk. |
| Crossing or Rubbing Branches | Branches are tangled, rubbing against each other, and creating bark wounds. | Remove weaker or poorly positioned branches to prevent damage and infection. |
| Heavy Limbs at Risk of Breaking | Large branches droop or sway heavily during storms. | Reduce weight by thinning smaller secondary branches, cutting back to natural growth points. |
| Excessive Shade on Property | Lawn, garden beds, or parts of the home receive too much shade. | Remove selected inner branches to let in more light without harming tree balance. |
| Storm Damage or Uneven Growth | One side of the crown looks thicker or lopsided due to wind or breakage. | Thin denser areas carefully to restore symmetry and reduce wind resistance. |
Benefits of Tree Crown Thinning
Tree crown thinning provides multiple advantages, combining both functional and aesthetic improvements. The primary benefits include:
Tree crown thinning is particularly effective on mature trees where overcrowded branches hinder airflow and sunlight or on fast-growing species that develop dense foliage.
When to Use Tree Crown Thinning
Understanding the appropriate timing and situations for tree crown thinning ensures that the tree benefits without unnecessary stress. Tree crown thinning is ideal in the following circumstances:
The Best Time for Tree Crown Thinning
Timing is critical for minimizing stress and encouraging rapid recovery. The ideal period for tree crown thinning is late winter to early spring, when the tree is dormant. At this stage, wounds heal faster, and there is less sap flow, which reduces the risk of attracting pests. Light corrective thinning can also be done in summer, particularly to remove dead or damaged branches. However, avoid thinning during extreme heat or drought, as this can compromise the tree’s health.
Tree Types Best Suited for Crown Thinning
Not every tree responds the same way to tree crown thinning, so knowing which species tolerate this pruning method helps ensure optimal results.
| Tree Type | Examples | Suitability for Crown Thinning | Notes & Considerations |
|---|---|---|---|
| Hardwood (Deciduous) | Oak, Maple, Ash | Highly suitable | Respond well to selective thinning; structure improves while retaining natural shape. |
| Evergreen (Coniferous) | Spruce, Pine | Use with caution | Thinning can open the canopy but over-thinning may expose interior branches and reduce winter hardiness. |
| Fruit Trees | Apple, Cherry | Ideal for fruit production | Light thinning improves sunlight exposure, airflow, and fruit quality. |
| Ornamental Trees | Dogwood, Magnolia | Suitable with care | Avoid aggressive cuts; focus on internal overcrowding rather than overall size reduction. |
Preparation Steps for Crown Thinning
Preparation prevents accidents and ensures the tree responds well to pruning. Before starting:
- Site Assessment: Check for power lines, buildings, or vehicles near the tree. Clear the drop zone for falling branches.
- Branch Evaluation: Identify dead, diseased, or weak branches that need removal first. These branches often create hidden hazards.
- Plan Your Cuts: Decide which areas of the canopy require thinning. Mark branches if necessary to avoid over-pruning.
- Escape Path: Always establish a safe exit route in case branches fall unpredictably.
Get Precise Cuts & Lasting Results For Your Tree
Don’t risk damaging your trees with uneven cuts. Book our expert pruning service today and keep your trees healthy, balanced, and looking their best.
Tools You’ll Need
Proper tools ensure clean cuts, reduce stress on the tree, and make the process safer for you. Selecting the right tools depends on branch size, tree height, and your pruning experience.
Hand Tools
- Bypass pruning shears (≤ 2 cm / ¾ in diameter): Perfect for twigs and small shoots; allow precise cuts without crushing stems.
- Loppers (≈ 2–5 cm / ¾–2 in): Long handles provide leverage for medium branches, ideal for reducing density in mid-canopy areas.
- Pruning saw (≥ 5 cm / 2 in): Curved blades enable controlled cuts on thicker limbs; keep blades sharp to prevent tearing.
Pole Tools for Higher Canopy
- Pole pruner/pole saw: Extends reach for high branches, allowing you to perform tree crown thinning from the ground safely. Avoid overreaching and always maintain solid footing.
Tool Care
- Disinfect blades between trees with 70% isopropyl alcohol to prevent disease spread.
- Replace dull blades promptly; sharp tools make cleaner cuts that heal faster.
Safety Gear
Safety is essential when thinning branches, particularly in tall trees:
- Helmet + eye protection: Protects against falling debris and sawdust.
- Gloves: Ensures a firm grip and protects hands during cuts.
- Sturdy footwear: Stable footing reduces the risk of slips.
- Hearing protection: Required if using powered saws.
Rule of Thumb: If a branch is larger than 10–15 cm (4–6 in) or requires climbing, hire a certified arborist. DIY thinning should stay ground-based whenever possible.
Arborist Standards for Crown Thinning
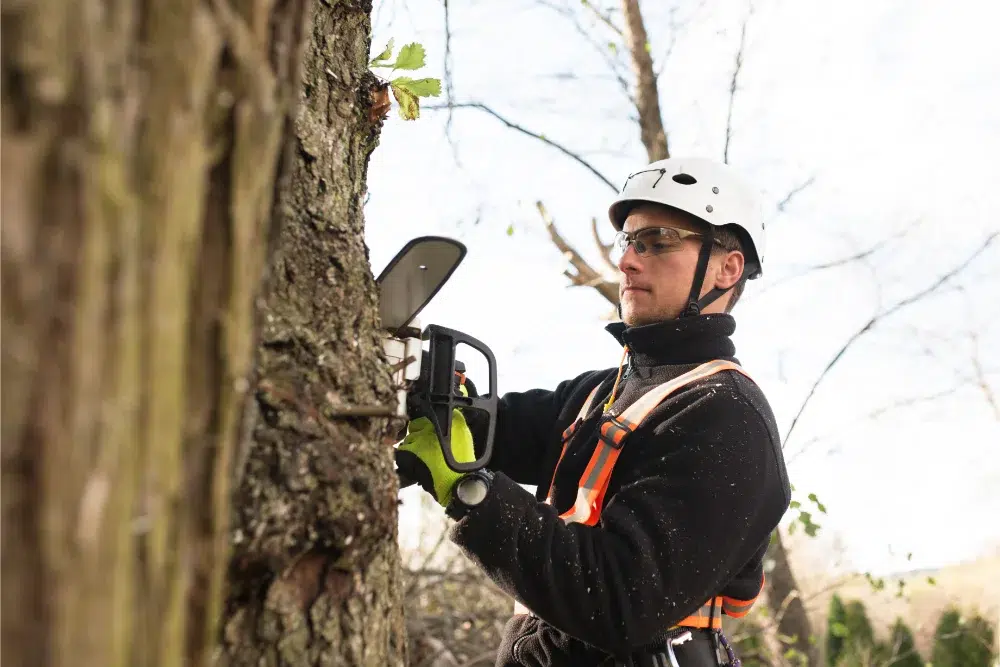
When hiring an arborist in Canada, the standards that arborists follow are what you should pay attention to when discussing crown thinning. A qualified arborist should work according to the ANSI A300 pruning standards, which limit removal to 20–30% of the live crown in one session and require cuts to be made just outside the branch collar for healthy regrowth. They should also thin the canopy evenly throughout the tree, avoiding practices like “lion’s tailing” that can leave branches weak and prone to breakage.
In Canada, it’s also important that they follow the CSA Z133 safety standards, which set strict rules for climbing, rigging, and protective gear. So, don’t forget to ask your arobirst about these details!
Costs of Tree Crown Thinning
In Canada, the cost of crown thinning usually ranges between $300 and $700 per tree, while in Ottawa it often falls between $400 and $800, with larger or harder-to-reach trees on the higher end. These estimates cover professional arborist services, but final pricing depends on specific conditions of the job.
Key factors that affect the price:
- Tree size and height ➝ Taller or wider trees require more time, equipment, and crew.
- Tree species and branch density ➝ Dense hardwoods like oak take longer than softer species like spruce.
- Accessibility ➝ Trees close to houses, fences, or power lines need extra safety measures.
- Level of risk ➝ Storm-damaged or leaning trees may require advanced rigging and insurance coverage.
- Cleanup and disposal ➝ Extra costs if wood and debris must be hauled away instead of left on site
How to Perform Crown Thinning
Tree crown thinning follows a logical process to reduce canopy density while preserving the tree’s natural shape and health. Following a careful sequence ensures both safety and effective results.
Step 1: Identify Branches to Remove
Selecting the right branches is the core of effective tree crown thinning. Focus on improving airflow, light penetration, and structural integrity. Arborists caution that too much internal thinning can do more harm than good, since the inner canopy helps absorb wind force (known as the branch dampening effect).
That means your first focus should be on:
Branches to Retain
Step 2: Make Proper Cuts
When tree crown thinning, your goal is to remove selected interior branches to reduce canopy density without changing the tree’s natural outline. This is done through thinning cuts, removing an entire branch back to its point of origin, just outside the branch collar.
How to do it correctly:
- Start with crossing, rubbing, or inward-growing branches, since these restrict airflow and sunlight.
- Always cut just beyond the branch collar (the slightly swollen area where the branch meets the trunk or a larger limb). Cutting too close creates wounds that heal poorly; leaving stubs invites decay.
- Angle your cuts slightly so water runs off the surface and doesn’t pool near the wound.
- Use bypass pruners for small interior twigs (under ~2.5 cm / 1 inch thick) and a pruning saw for larger limbs deeper in the crown.
- Step back every few cuts and check the canopy. The crown should look balanced and natural—never hollowed out or lopsided.

Unlike heading cuts (which encourage dense regrowth near the cut), thinning cuts minimize regrowth. That makes them ideal for tree crown thinning, where the aim is to open the canopy long-term rather than promote new shoots.
Step 3: Maintain Canopy Balance and Proportion
Thinning should open the canopy without altering the tree’s natural shape.
Shape, Don’t Strip
Balance Live Crown
Common Mistakes to Avoid
When crown thinning, people often make the mistake of removing more than 25–30% of the foliage at once, which leaves the tree stressed and unable to recover properly. Another common error is cutting large scaffold branches instead of smaller, crowded limbs, creating wounds that heal slowly and attract pests.
Many also leave stubs rather than making clean collar cuts, which prevents proper healing and leads to decay. A frequent issue known as “lion tailing” occurs when branches are stripped bare except for leaves at the tips, shifting weight outward and increasing the risk of breakage. Finally, pruning without a clear purpose or doing it at the wrong time of year can weaken the tree instead of improving airflow, light, and overall health.
Aftercare and Long-Term Maintenance
Tree crown thinning doesn’t end once the last branch is cut. The way you care for the tree afterward is just as important as the pruning itself. Proper aftercare helps the tree recover faster, reduces stress, and keeps the canopy balanced for years to come.
Watering After Thinning
When a tree loses foliage, it temporarily loses part of its energy-producing system. Extra water support helps it bounce back.
Mulching for Root Protection
Mulching acts like insulation for your tree, shielding the roots from temperature swings and helping the soil retain moisture.
Monitoring for Pests and Disease
Fresh pruning wounds can attract unwanted visitors, so regular inspection is essential.
Scheduling Follow-Up Thinning
Tree crown thinning is not a one-time job—trees grow back. Keeping up with maintenance ensures the canopy stays open and balanced.
Get Precise Cuts & Lasting Results For Your Tree
Don’t risk damaging your trees with uneven cuts. Book our expert pruning service today and keep your trees healthy, balanced, and looking their best.
FAQ: Crown Thinning
Still have questions about crown thinning? Here are some quick answers to common concerns.
In short,
Crown thinning is a precise, beneficial pruning technique that enhances tree health, safety, and aesthetics. By selectively reducing canopy density, you allow better airflow, sunlight penetration, and structural balance, while maintaining the tree’s natural shape. Using the right tools, making clean cuts, and following a careful aftercare plan ensures long-term tree vitality. Whether your goal is improved landscape appearance, reduced storm risk, or stronger tree structure, crown thinning provides a controlled, effective approach for healthier, thriving trees.